Campaigns
A campaign allows you to automate the targeting of, and sending to, your contacts.
Templates
We have four templates for you to choose from when creating your new campaign:
- Blank: A blank campaign with no settings or sends. Ready to be configured from scratch.
- Daily Lead-Gen: Efficiently engage potential customers with concise, persuasive messages, prompting immediate action and regular interaction to boost leads every day.
- Marketing Boost: Capture attention with dynamic, enticing content, aiming to amplify brand awareness and drive increased engagement through strategic, targeted messaging.
- Retargeting: Re-engage past customers or interested leads with tailored, compelling messages, aimed at reigniting their interest and encouraging a revisit and purchase through strategic, personalized communication.
Recipients
The following options are available in the "Recipients" tab:
Campaign information
- Name: Name of your campaign
- Country: The country to SMS messages to.
- Delivery method: The delivery method to use, which mainly determines who pays for the replies. Note, not all methods are available in all countries. Options include:
- Two-way (Reverse Charge): You as the Dripcel user pay for the replies coming in. Some industries legally require this, for example, people must always be able to optOut of medical insurance messages for free.
- Two-way: The respondent pays for the reply with their airtime.
- Transactional: Does not allow replies. Mainly used for sending transactional messages. For example, a bank sending a message to a customer to confirm a transaction, or sending an OTP.
Compliance
When a contact opts-in or opts-out of a message from a campaign, at what level should they be deduped? There are 3 options for this:
- Campaign: Never send this contact a message from this campaign again.
- Tag: Never send this contact a message with this tag again.
- Global: Never send this contact any message again.
Link tracking
Dripcel has highly-featured link shortening and tracking built-in. You can use this to track clicks on links in your SMS content.
To get started:
Redirect Link: Fill in the URL that you want to redirect to. For example,
https://my-brand.com?source=SMS.- Templates: You can use
{{templates}}in your Redirect Link. They work in the same way as webhook templates. Note, if you have Track Unique Clicks enabled, then you can fill in the contact's fields. If not, then only the Campaign's fields are available for the template.
- Templates: You can use
Track Unique Clicks: Enable this option if you want to track unique clicks (based on cell number). Note that tracking unique clicks makes the shortlink longer, which may result in the SMS being sent in more than 1 part.
Add the link to your copies, using the
{{CLICK_URL}}template.
Now, when you send the SMS, Dripcel will put a shortlink in place of the {{CLICK_URL}} template. When the contact clicks on the link, they will be redirected to the Redirect Link, and Dripcel will track the click.
Financial
- Income per Lead: Revenue earned for each lead (Opt in). Leave blank or 0 to ignore.
- Default Sale Value: Revenue earned for each sale (if no value is specifically given to that sale).
Categories
Categories are a way to group your campaigns together. You can create a new category, or select an existing one.
Once you've put some campaigns in a category, you can group by that category in the different reports.
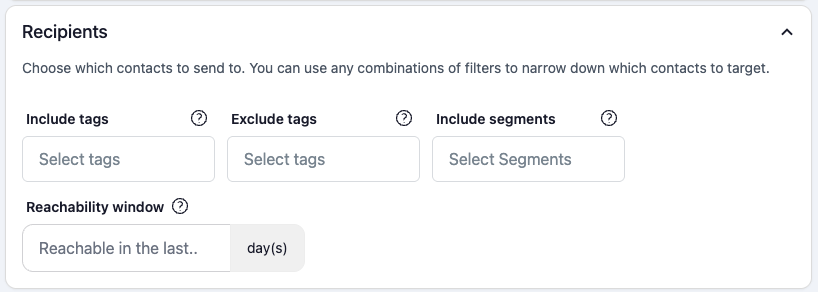
Recipients
Targeting is where you choose which contacts to send to. You can use any combinations of filters to narrow down which contacts to target.
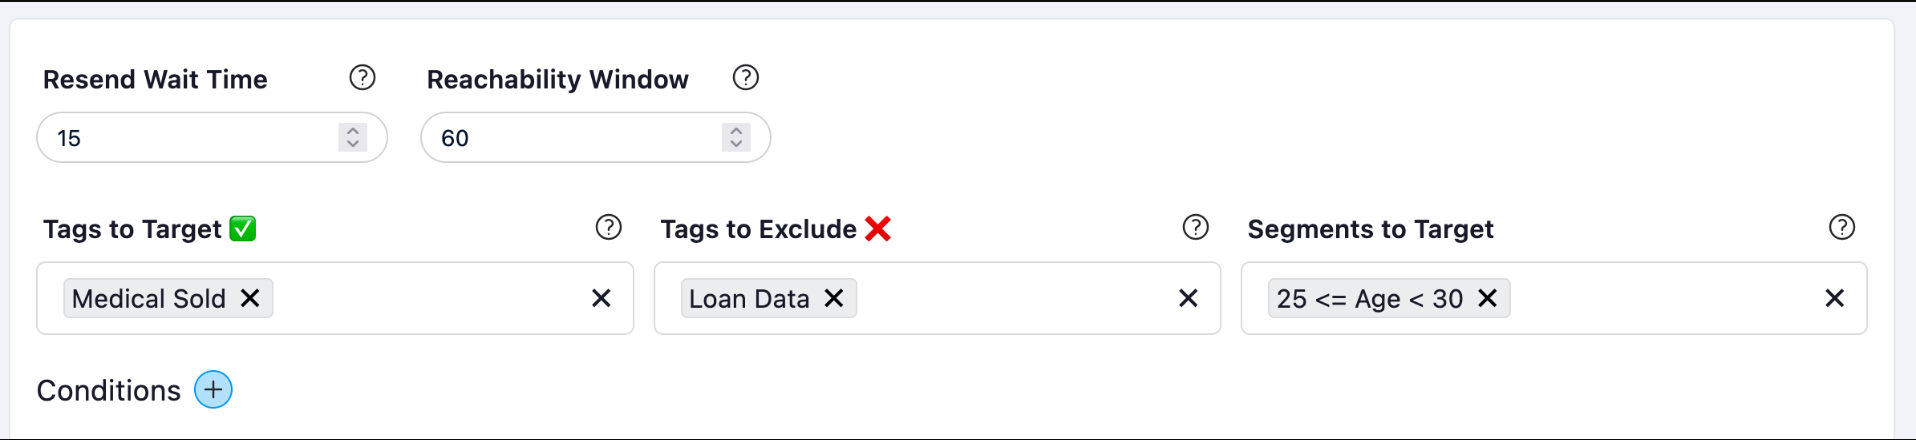
- Include tags: The tags to target. A contact must have at least one of these tags to be targeted.
- Exclude tags: The tags to exclude. A contact must not have any of these tags to be targeted.
- Include segments: The segments to target. A contact must be in at least one of these segments to be targeted.
- Reachability window: Only send to contacts that were reachable in the last X days. Leave blank to send to ignore.
You can update your targeting at any time. The next time the campaign sends, it will use the new targeting.
Advanced targeting
Target contacts based on events that happened to them, or events triggered by them. For example, target contacts who have not received a message from this campaign in the last 30 days.
- Event: The event that happened to the contact, for example the last date the contact was sent to.
- Source The source of the event.
- Timeframe: How long ago the event happened.
Content
Content is the SMS messages that will be sent to your contacts. You can add as many copies as you like, and Dripcel will automatically choose which content to send to each contact. To add a content:
- Click on New content
- Paste/type your SMS content into the text box
- Use the "Custom Field" dropdown to add templates (personalisation) to your content
- Click the
~button to fill in the templates to estimate the length of the SMS
Selection method
This setting determines how Dripcel chooses which copy to send to each contact. The options are:
- First: This method chooses the first content in the list (from left-to-right on your screen).
- Random: Content is chosen randomly. This is a good option to gather data on the performance of your content, so that Dripcel can learn which content generates more leads / clicks.
- Maximise performance: Dripcel learns which content drives more leads and sales, while optimizing itself to deliver more of that particular content.
- Least sent: This method chooses the copy that has been sent the fewest times. Choose this option when adding a new copy to an existing campaign, so that the new copy gets sent more often.
Max parts
This setting will limit the maximum number of parts of any message that is being sent. If, for example, you send a personalised message to someone with a very long name, the message may be sent in 2 parts. If you set the Max Parts to 1, then the message will not be sent, and the contact will be skipped.
Content templates
Content templates are used to customise SMS content based on the recipient's information. You can use both default and custom fields in your SMS content by using the following syntax: {{field}}.
For example, you can use the firstname field, and your first custom field c1 by using Hello {{firstname}}! Your c1 value is {{c1}}.
Fallback
If a field is not available for a contact, you can specify a fallback value to use instead. For example, if a contact does not have a firstname, you can use {{firstname?hello}} to use hello instead.
Options
You can also add options to your templates which lets you customise the appearance of the field. The syntax is {{field|options?fallback}}
The options are:
case:upper,case:lower, andcase:title, which will convert the field toUPPERCASE,lowercase, andTitlecaserespectively.
Here is an example of how to use the case option: {{firstname|case:title}}. If the contact's firstname is john, then the output will be John.
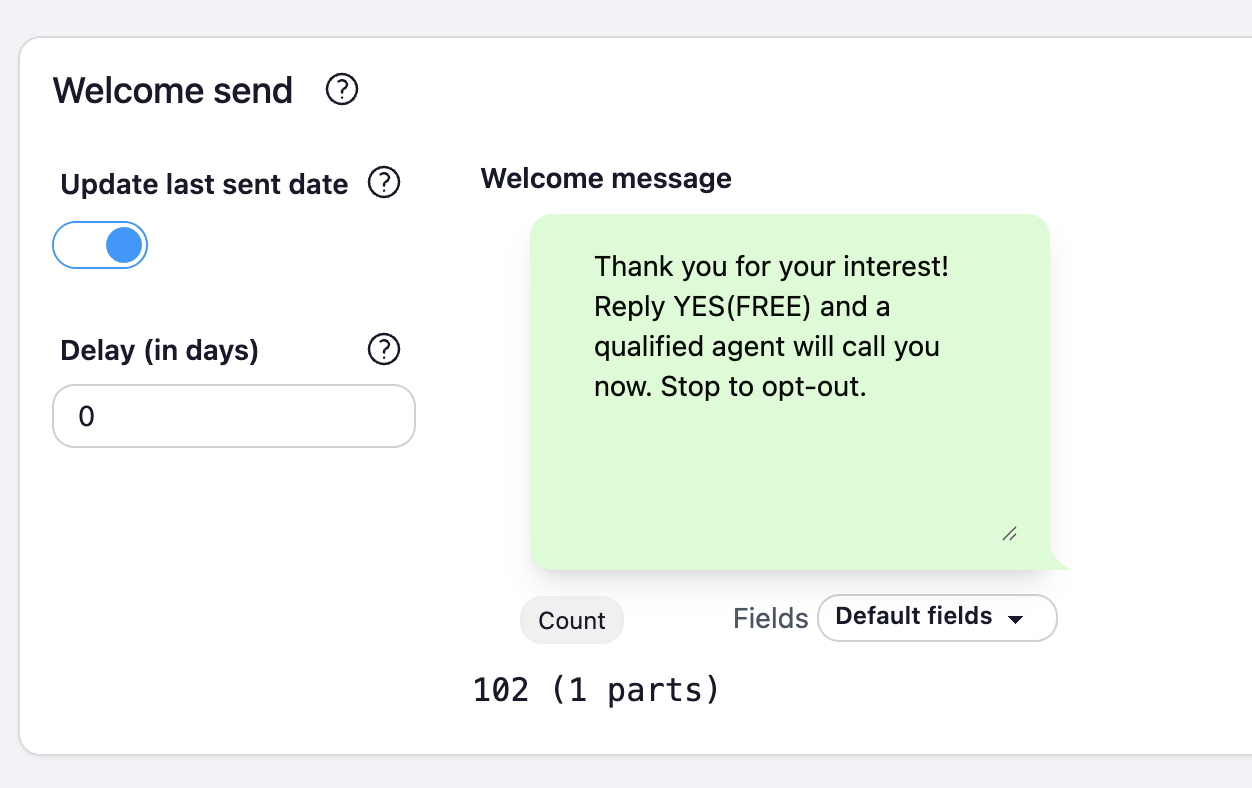
Welcome send
A welcome message provides a way to message a contact when they are first added to Dripcel. When a new contact is uploaded to your account, you can choose to send them the welcome message of a given campaign.
Welcome messages can be triggered by the following:
- Manual Uploads,
- Uploading contacts via API,
- Uploads triggered by the GetResponse webhook integration.
Options
- Active: Whether to send the welcome send to new contacts.
- Update Last Sent Date: Whether to update the contact's last sent date when the welcome send is sent. This is useful if you want to use the resend wait time feature.
- Delay: The number of days to wait before sending the welcome send. Use 0 to send immediately.
Updates
Dripcel allows you to trigger an action based on if a person Lead or opts-out.

- Add/Change Field: Add or change a custom field item to the recipient
- Add Tags: Add a tag to the recipient
- Remove Field: Remove a custom field item from the recipient
- Remove Tags: Remove a tag from the recipient
Hooks
Hooks are different actions that can be triggered when a contact replies to a send from a campaign.
Read the full hooks guide here.
Automation
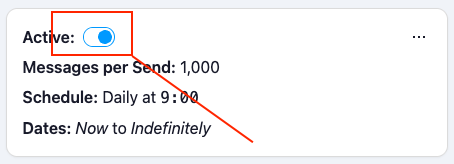
Automation is where you can set up Recurring Sends, which allow you to send to a group of contacts on a recurring basis. For example, you can send to a group of contacts every Monday at 9am.
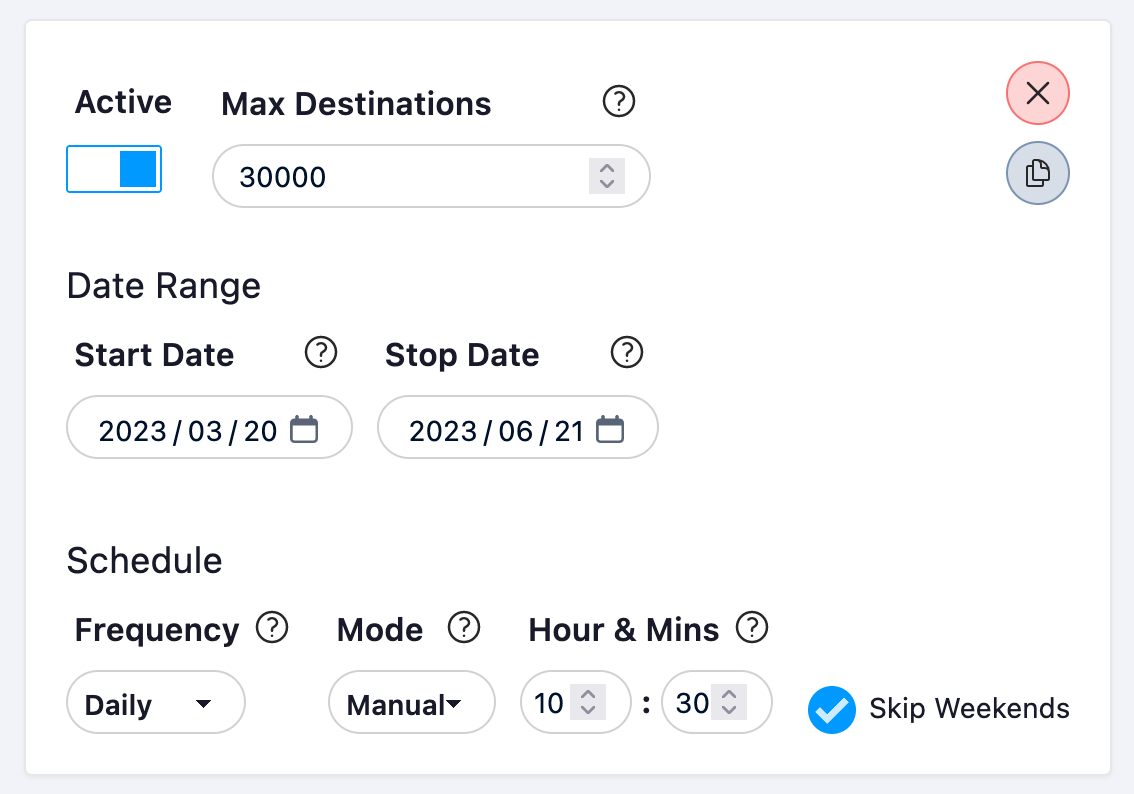
To set up a recurring send:
- Enter your Max Destinations per Send
- The maximum number of contacts to send to after filtering for dedupes and other criteria
- Add your Start and Stop Date
- Leave the start date blank to start immediately
- Leave the stop date blank to run indefinitely (or until you manually deactivate it)
- Choose your Frequency (daily, weekly or monthly)
- Choose the Mode for time-of-day:
- Manual: Choose a specific time to send
- Random: Choose a random time from a range
- Best: Choose the best time based on previous sends
- If you would like to skip weekends, enable the "Skip Weekends" option
- Override Segments: Override the segments for this particular recurring send. Useful to send to different segments without needing to create a new campaign.
Recurring sends are Active by default. You can deactivate them at any time by clicking on the toggle.